

Pickled Garlic can turn just about any dish or dressing into something bright, tangy, and bursting with flavor. This simple recipe is quick, easy, and it results in the most beautiful flavor infusers that also make a great snack.
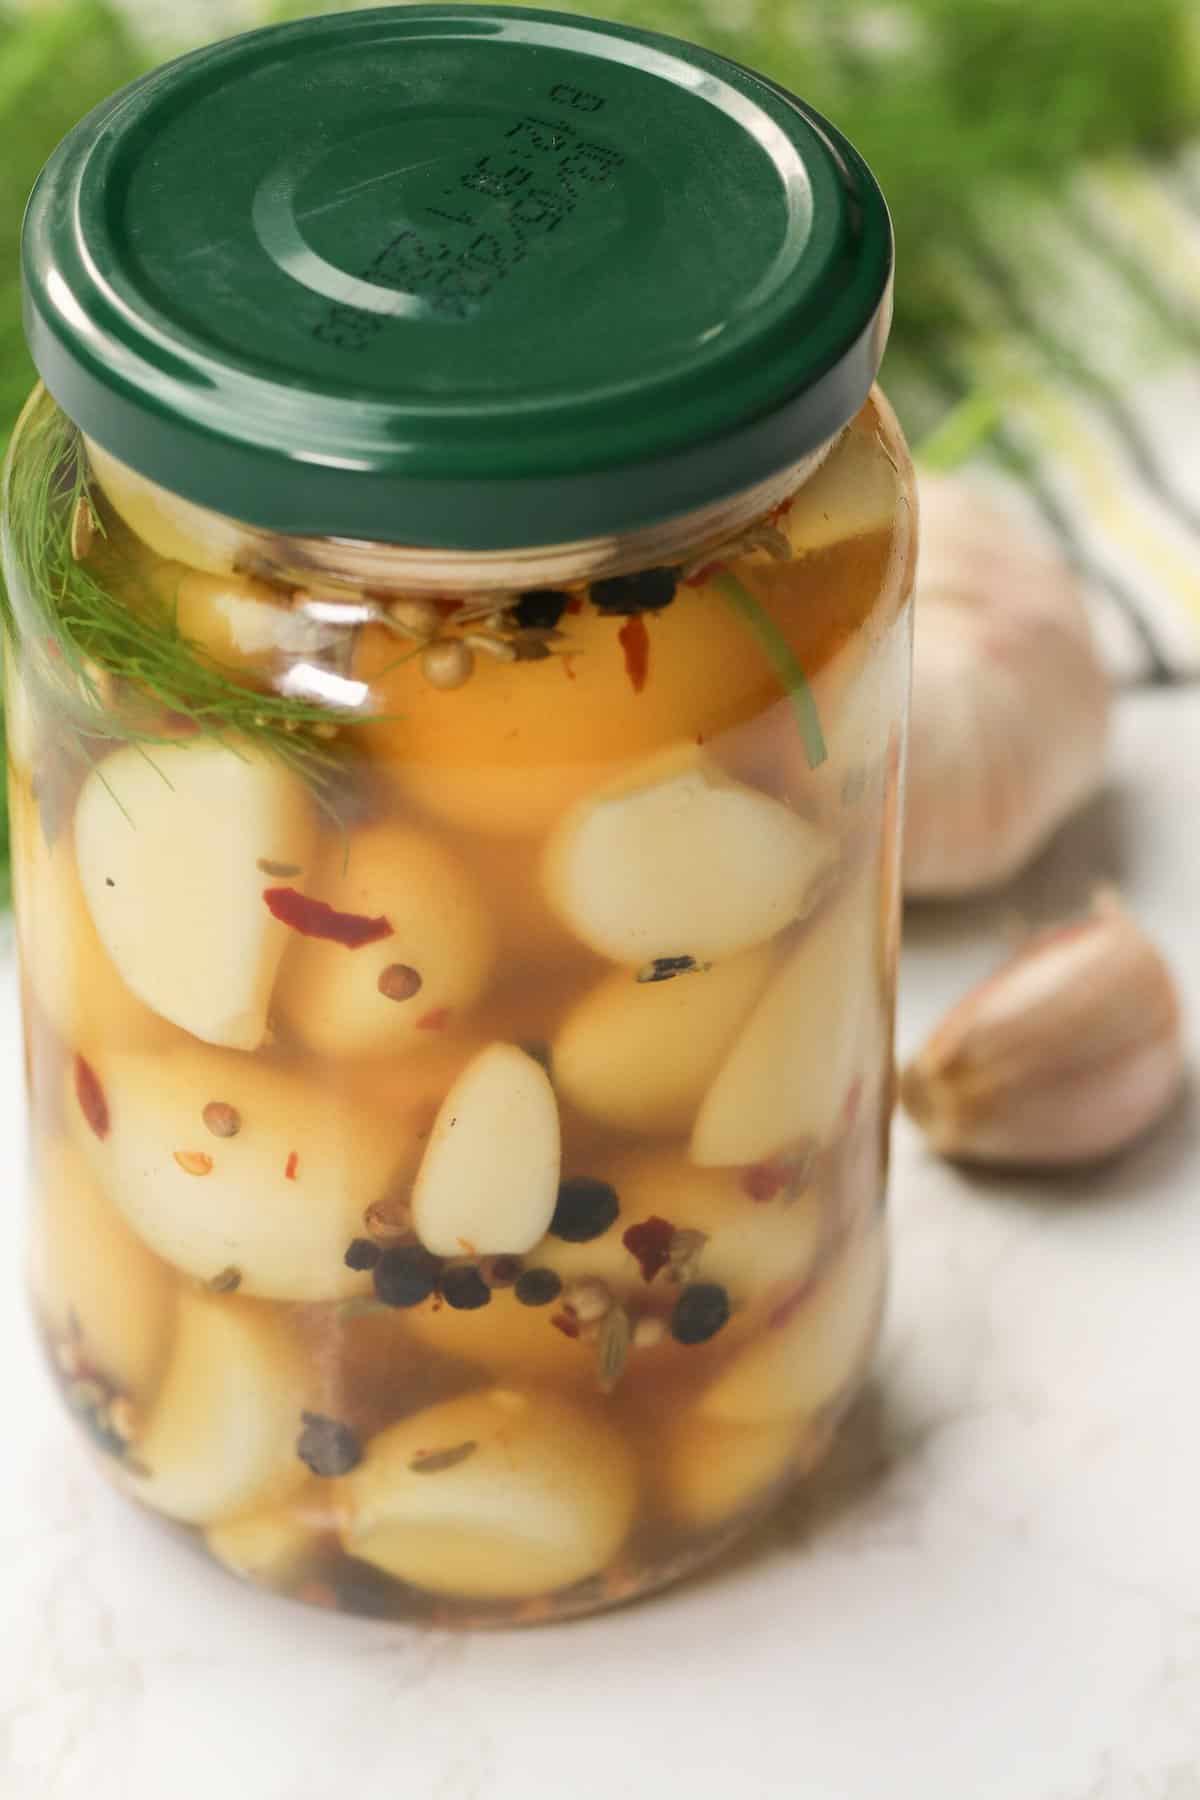
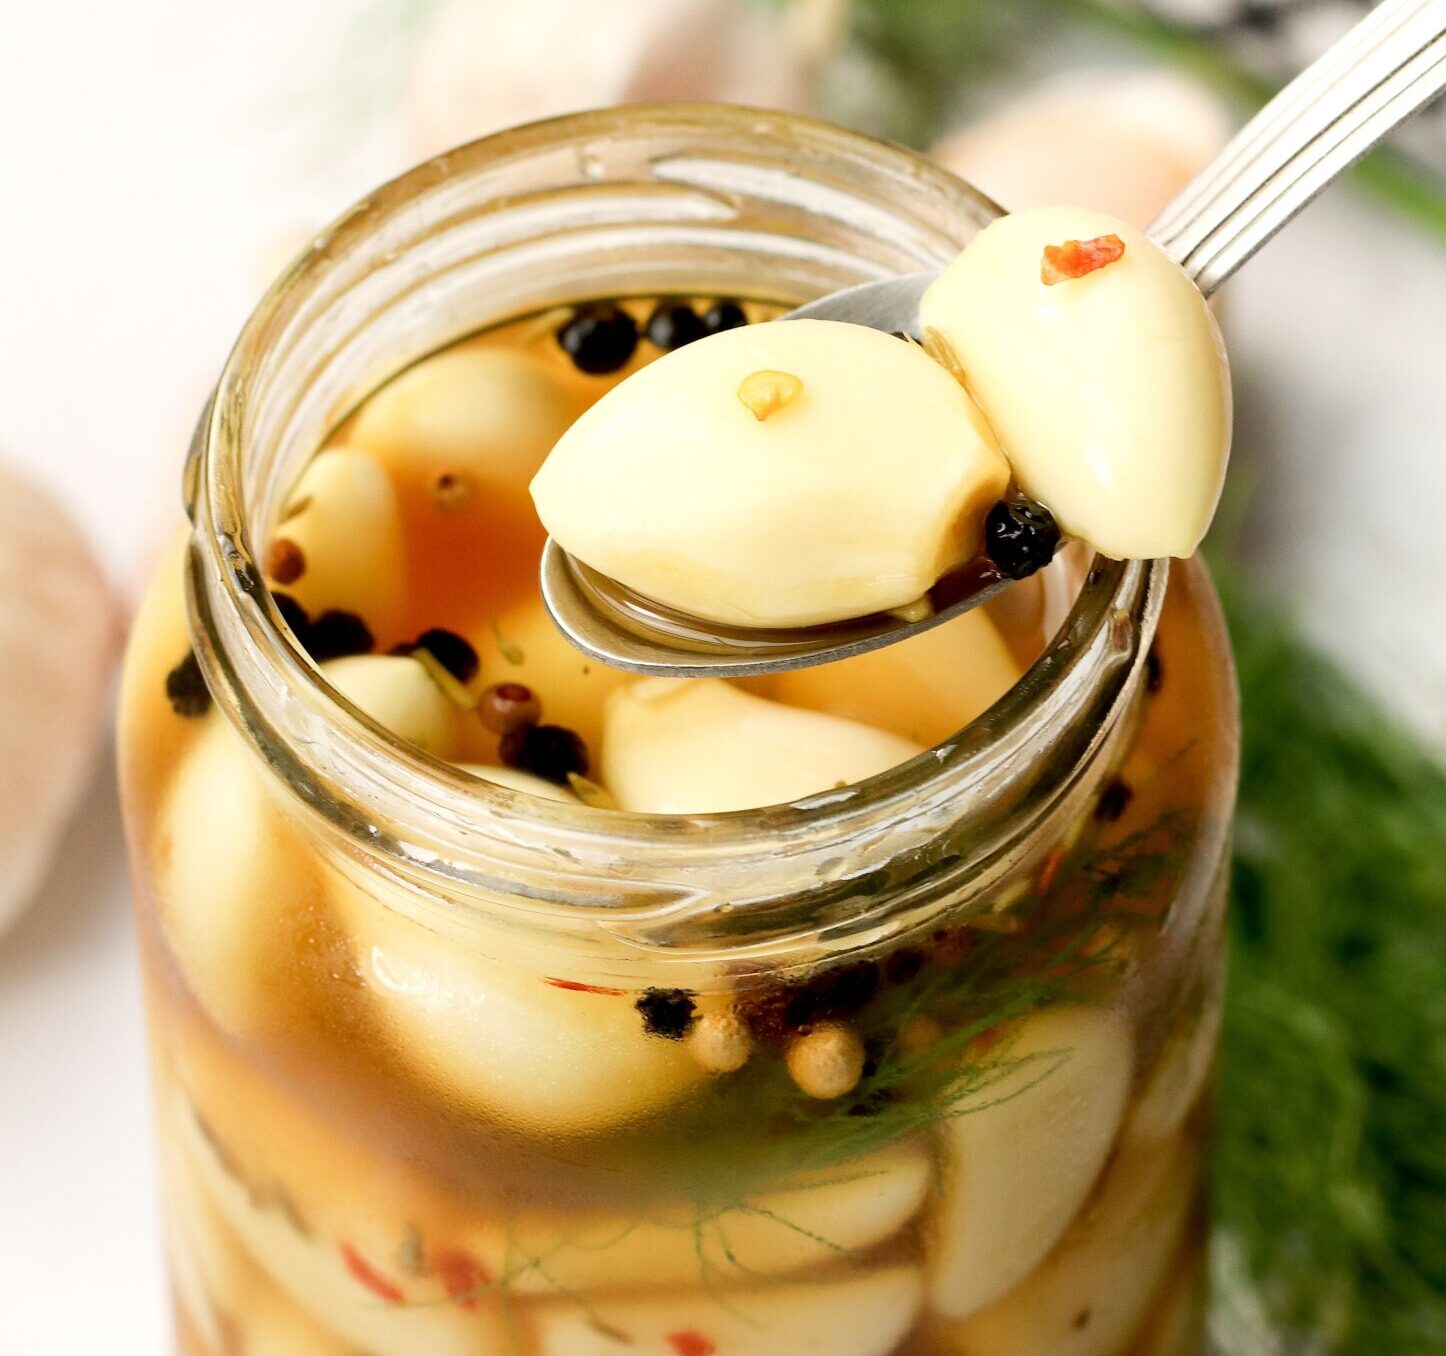
If you love garlic and all things pickled, then this is going to be your new favorite recipe, guaranteed. Ultra tangy, with subtle sweet and spicy notes, pickled garlic is so good you’ll find yourself eating them straight out of the jar. 😋
Of course, there are a plethora of ways you can use these, besides just for snacking. They can level up dressings, marinades, and sauces. They go great on burgers and just about any sandwich and are a lovely addition to salads and charcuterie boards. The sky’s the limit for pickled garlic.
The Easiest Pickled Garlic
If you think pickling sounds complex, let me put you at ease. This simple pickling recipe is not a full-on canning project. It only takes about 15 minutes to make the brine. And all you need equipment-wise is a few glass jars with airtight lids and a stainless steel or enamel saucepan.
So don’t let the simple process fool you. This pickled garlic recipe will last at least four months in your fridge!
What You Need
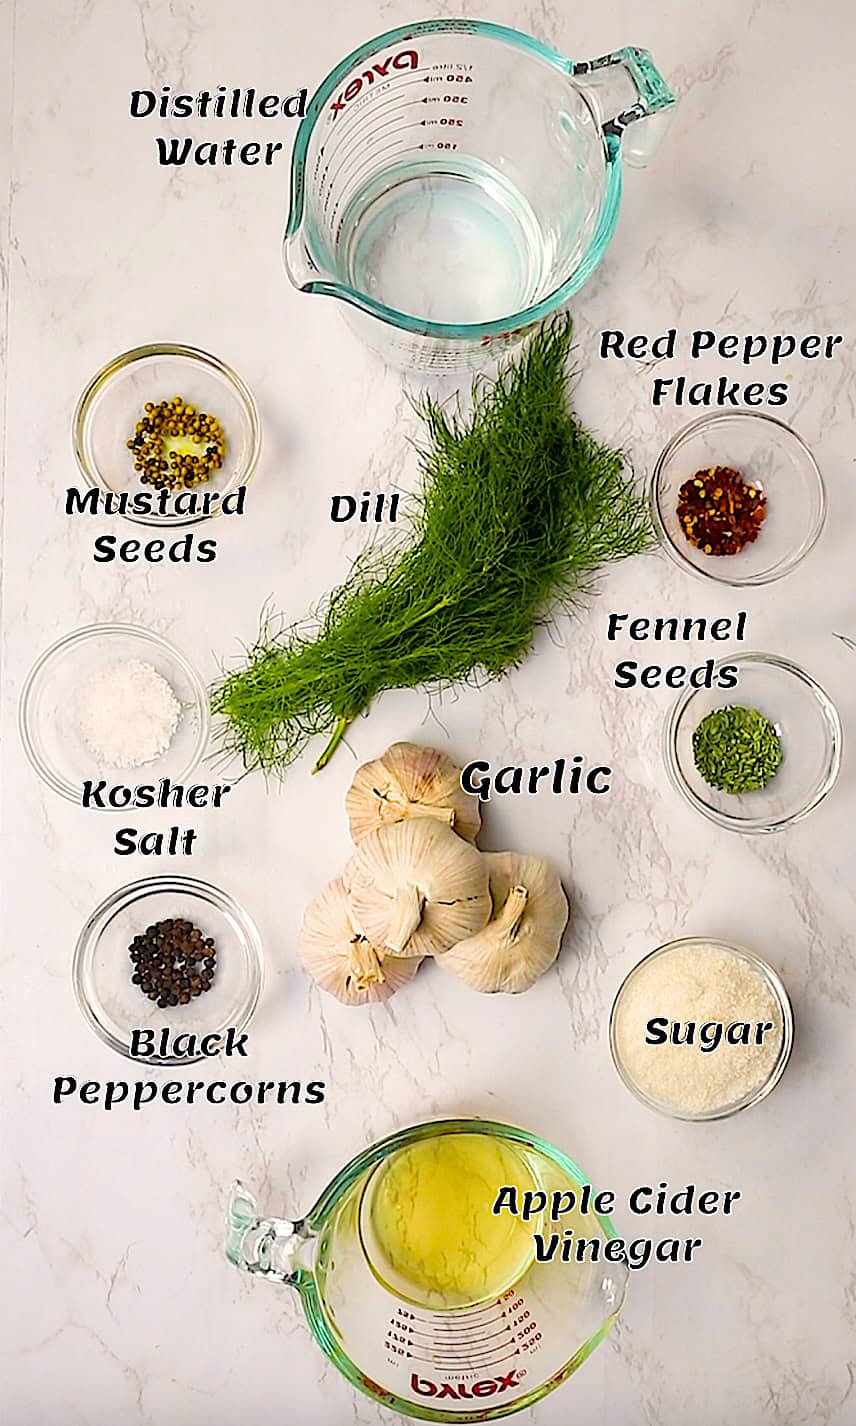
- Garlic – You’ll need about a cup’s worth of fresh garlic cloves. Make sure to peel them before you begin!
- Brine Ingredients – Gather distilled water and some apple cider or white vinegar for the brine.
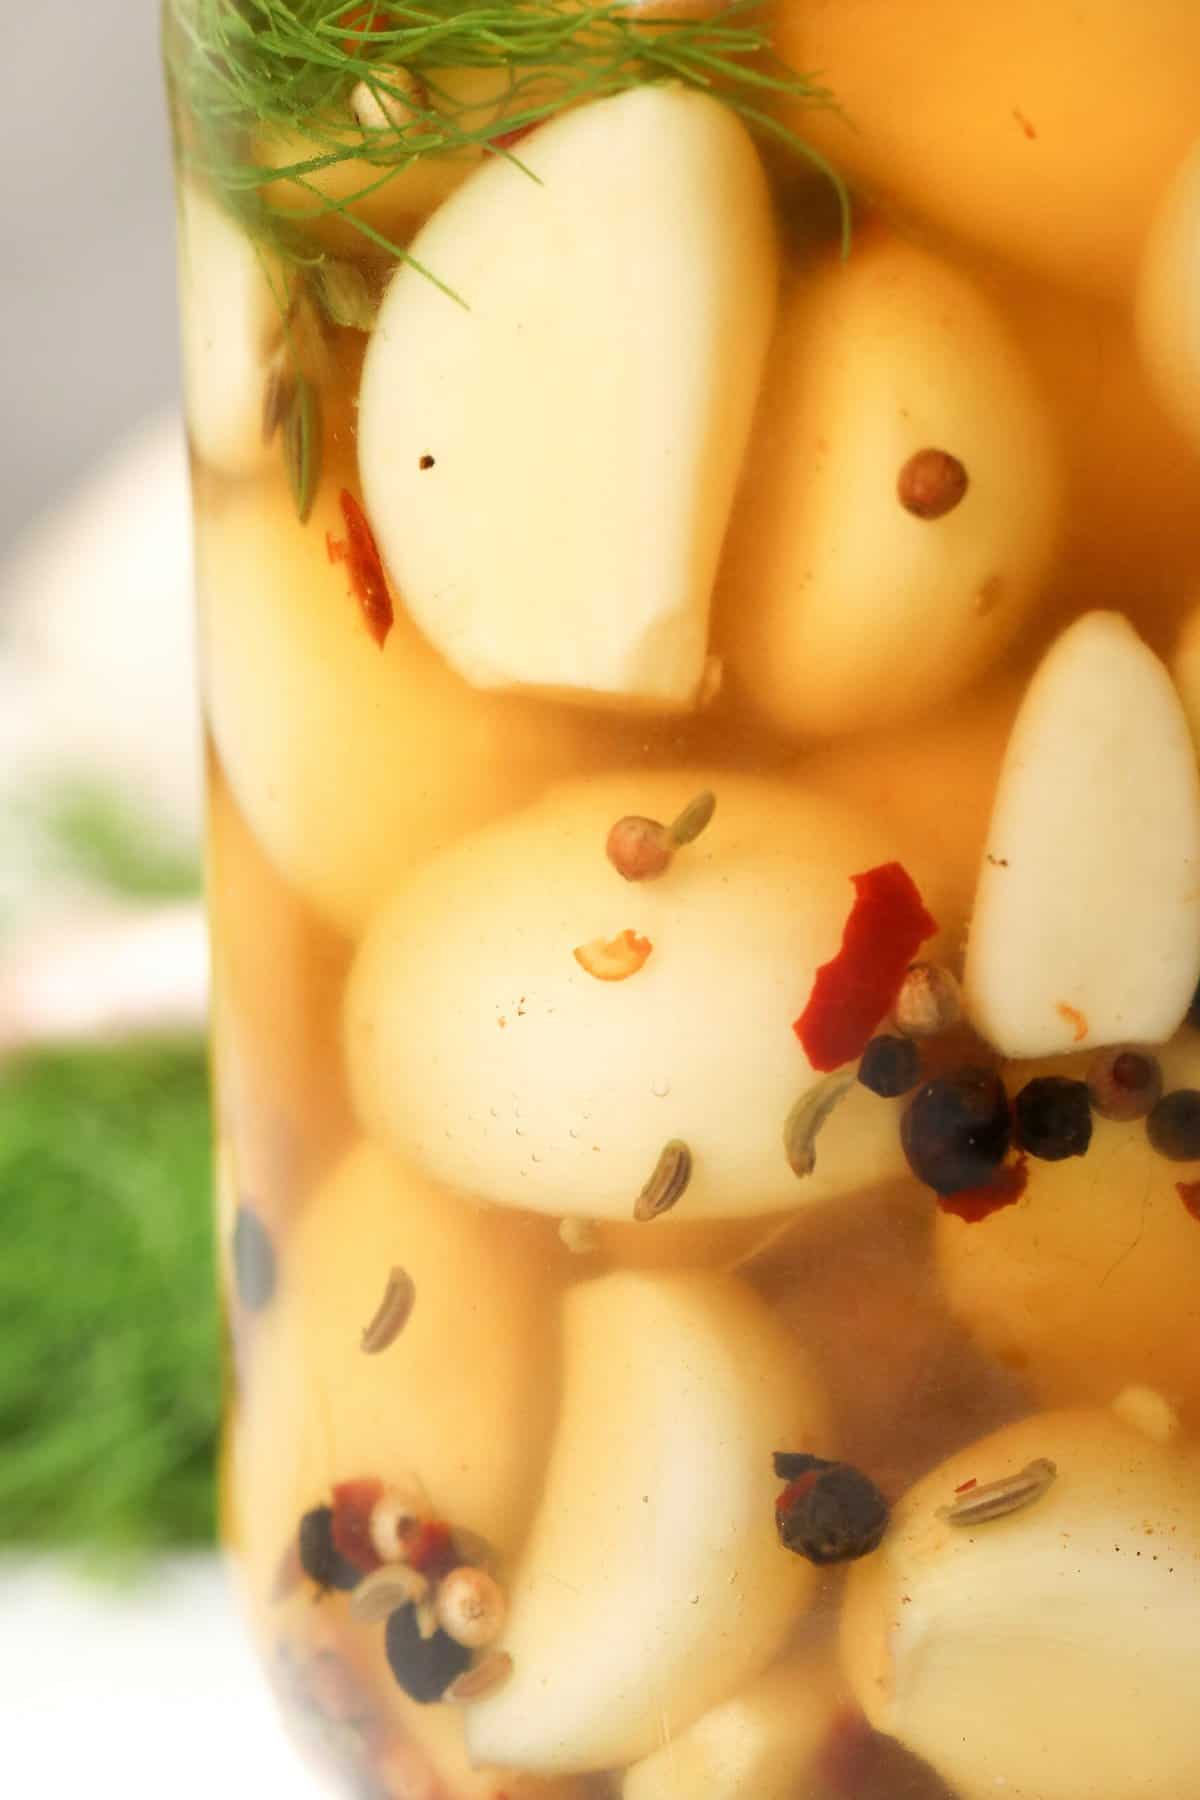
- Seasonings – Kosher salt, sugar (optional), whole black peppercorns, mustard seeds, fennel seeds, crushed red pepper, and some fresh dill make this brine ultra tasty. 👌
How to Make Pickled Garlic
Prep
- Sterilize glass jars by boiling them in water for 10 minutes. Keep them warm until ready to use.
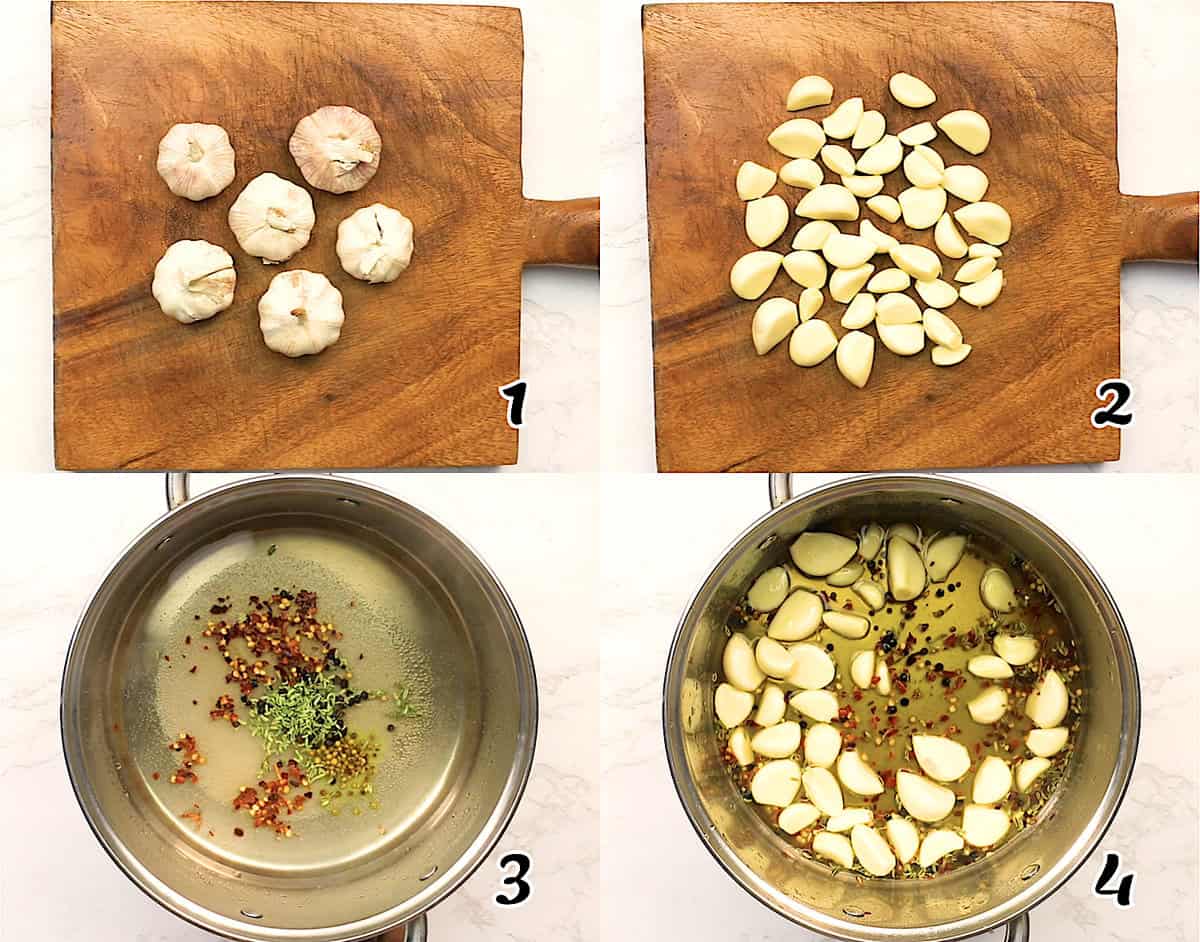
- Make the Brine – Combine the water, vinegar, sugar, kosher salt, black peppercorns, mustard seeds, fennel seeds, and crushed red pepper flakes in a stainless steel or enamel saucepan.
- Simmer – Bring the pickling mixture to a boil, stirring until the sugar and salt dissolve. Add the garlic to the boiling mixture and cook for 1 minute.
Pack the Jars
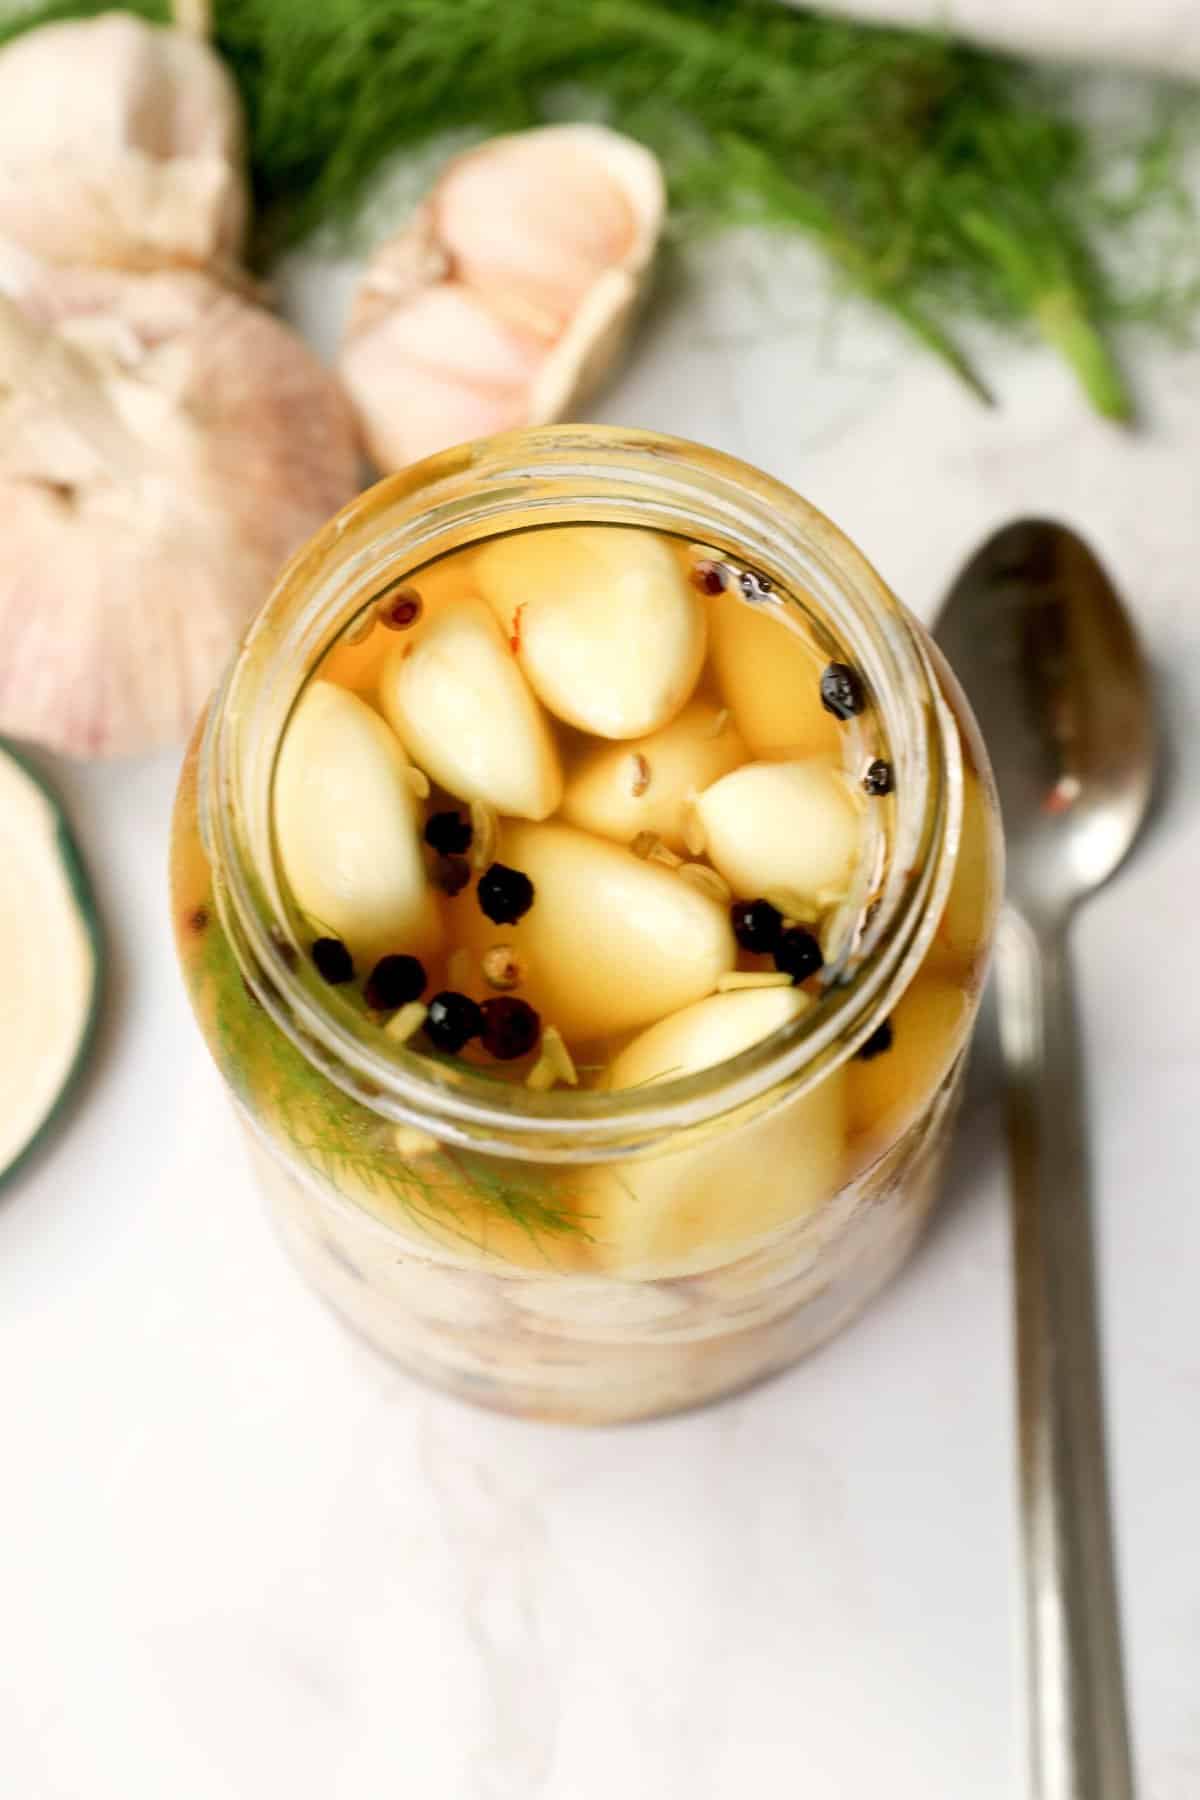
- Fill Jars – Divide the garlic between the sterilized jars with a slotted spoon, leaving about a ½ inch of headspace. Then, add a sprig of fresh dill to each jar.
- Add Pickling Mixture – Pour the hot pickling liquid into the jars, covering the garlic and leaving ½ inch of headspace.
- Remove any air bubbles, wipe the jar rims with a clean, damp cloth, and close the jars tightly.
- Store the jars in the refrigerator for about 3 weeks before consuming. The pickled garlic will last at least 4 months in the fridge.
Recipe Variations
- Make it herby. Add extra herbs to the brine liquid, such as bay leaves, fresh thyme, and rosemary, for an enhanced herby flavor. 🌿
- Make it sweet. Add honey, maple, or brown sugar to the brine for a sweet pickled garlic. 🍯
- Make it smoky. Add smoked paprika, chipotle peppers, or smoked salt to your brine for an intense smoky flavor. 💨
Tips and Tricks
- Using pre-peeled garlic will save time, but you’ll lose out on flavor. So fresh garlic works best for this recipe.
- This recipe is not for shelf-stable jarred pickled garlic. It needs to be refrigerated, so don’t leave it out on the counter for long periods.
- If your garlic turns blue, don’t worry because it’s still safe to eat. To prevent it from turning blue for aesthetic reasons, use distilled water, kosher or sea salt, and stainless steel or enamel cookware to make the brine.
- If you have glass pint jars for canning, they work great. But I save store-bought pickle jars and the lids for this project.
Make-Ahead Instructions
Pickled garlic is a make-ahead recipe by nature. You’ll want to prepare these a few weeks before you plan on consuming them anyway to let the flavor mellow.
Serving and Storage Instructions
Serve pickled garlic as a snack or add it to your favorite dishes after the 3-week curing time.
Store pickled garlic in their jars with tightly sealed lids in the refrigerator. They should keep for at least four months. But always use a clean spoon or fork to take them out of the jar to avoid contaminating the brine. 🥄
How to Use Pickled Garlic
You can use your pickled garlic as a condiment or topping for burgers, a pulled pork sandwich, or pizzas. (It tastes amazing on chicken alfredo pizza.) You can also include it in stir fry and marinades. You can even enjoy pickled garlic as a standalone snack.
More Garlicky Recipes to Try
- Roasted Garlic
- Garlic Butter
- Butter Garlic Shrimp
- Garlic Mashed Potatoes
- Spicy Roast Garlic Broccoli
Watch How to Make It
Pickled Garlic
Prep: 9 minutes
Cook: 1 minute
Total: 10 minutes
American
Instructions
-
Sterilize your jars by boiling them in water for 10 minutes. Keep them warm until ready to use.
-
In a stainless steel or enamel saucepan, combine the water, vinegar, sugar, kosher salt, black peppercorns, mustard seeds, fennel seeds, and crushed red pepper flakes. Bring the mixture to a boil, stirring until the sugar and salt dissolve.
-
Add the garlic to the boiling mixture and cook for 1 minute.
-
Using a slotted spoon, divide the garlic between the sterilized jars, leaving ½ inch of headspace.
-
Add a sprig of fresh dill to each jar.
-
Pour the hot pickling liquid into the jars, covering the garlic and leaving ½ inch of headspace.
-
Remove any air bubbles, wipe the rims of the jars with a clean, damp cloth, and close the jars tightly.
-
Store the jars in the refrigerator for at least 3 weeks before consuming. The pickled garlic will last 4 months in the refrigerator.
Tips & Notes:
- Using pre-peeled garlic will save time, but you’ll lose out on flavor. So fresh garlic works best for this recipe.
- This recipe is not for shelf-stable jarred pickled garlic. It needs to be refrigerated, so don’t leave it out on the counter for long periods.
- To avoid the bluish color that sometimes occurs in pickled garlic, use kosher salt, avoid iodized table salt, and use distilled water to avoid trace minerals found in tap water.
- Use stainless steel or enamel cookware and utensils when pickling to avoid discoloration.
- Pack the garlic tightly into the jars to avoid air pockets and ensure even pickling.
- Please remember that the nutritional information is a rough estimate and can vary significantly based on the products used in the recipe.
Nutrition Information:
Serving: 3g| Calories: 18kcal (1%)| Carbohydrates: 4g (1%)| Protein: 0.4g (1%)| Fat: 0.1g| Saturated Fat: 0.01g| Polyunsaturated Fat: 0.03g| Monounsaturated Fat: 0.02g| Sodium: 123mg (5%)| Potassium: 29mg (1%)| Fiber: 0.2g (1%)| Sugar: 2g (2%)| Vitamin A: 15IU| Vitamin C: 2mg (2%)| Calcium: 12mg (1%)| Iron: 0.1mg (1%)
Reader Interactions